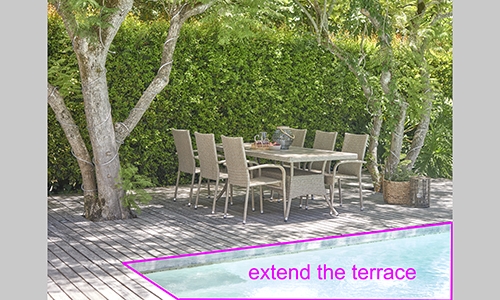
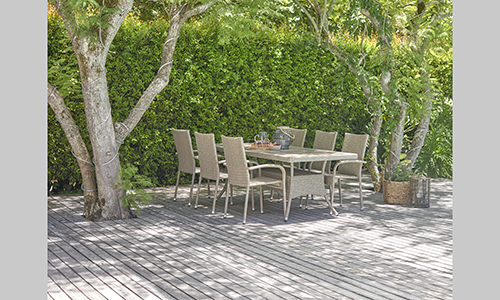
Background object retouching
If you do not need to isolate objects or models or whatever you’re working with, you’ve got to retouch the background object retouching rather than removing it. This mostly happens with models, but objects are often like this, too. When there are not any specific demands about the background’s color and tone, you’re good, because you’ll mostly need to clean it and that is it. Also, some companies want their images to seem equivalent and say:
Okay therefore the background should be light gray, neutral, from 245 to 250 on average. That’s actually worse than isolation because what comes from photographers is often quite different in terms of background exposure. Once you can just isolate the background and make, let’s say, 245 solid grays, and restore a natural shadow.
This is able to be faster than trying to regulate the image in order that it fits some background tone range. Also, you’ll determine that when photographers shoot white items, they often close the diaphragm a touch to avoid overexposure. This makes white items and therefore the background darker. If they shoot black items, they are doing the other, in order that the things don’t begin underexposed. For that, you’ll be getting different images with different backgrounds, and trying to form them even is crazy hard.
Once you consider the background when color correcting, you will find out that it doesn’t do any good to the objects or models. But the deal is that concentrating on the background while ignoring the objects is perhaps the foremost stupid thing you’ll neutralize is catalog retouching because the approach should be precisely the opposite.
Background object retouching Team:


Our experts may use the background as a tool when color-correcting because if it’s a weird tint, it most likely means the white balance is wrong. If it’s too dark, the thing is perhaps underexposed, and the other way around, and so on. Although maintaining a selected background color and nice contrast and exposure on all the objects at an equivalent time is like sitting on two chairs directly – an impossible trick.
The Models are easier. Its setup on model photography stations is typically very strict. People can’t really fiddle with the camera settings once you have a living person within the frame. The Models aren’t getting isolated very often; they mostly stay some neutral background. Once you do not have to get rid of the background, you’ve got to wash it. This really matters how dirty and worn it’s if that is the case. Your first task is Cleaning dirt because you cannot really avoid it.
Lots of tutorials on background cleaning presume you’ve got to isolate the background from the model or the thing and only then will you be ready to clean it. therefore the importance of isolation renders the entire idea of using natural backgrounds rather than some solid color useless. The rationale is isolating and cleaning is really longer than isolating and filling. For getting benefits from natural backgrounds, we’ve to wash them without isolating whatever is standing or lying on them. this does not add up, a minimum of in catalog retouching.
This is not mentioning the very fact that isolation in mass image productions has got to be performed on the clean backdrops, or it’d take an excessive amount of time, quite reasonable. Still, we also realize that a background used for shootings can’t be maintained spotlessly clean in the least time, albeit it’s cleaned daily. the rationale is when it’s used; it gets dirty within the process.
You need to stay in mind that once I say “a dirty background”, I do not really mean a situation when a model or an object is literally standing within the dirt. So, Pen Tool isolation is the only thanks to separate it from dirt. But before we find out how to wash backgrounds without dalliance on isolation, let’s work on definitions. Now the question is what a clean background is and what’s an unclean background?
So, Pasteurization or banding. That is what you get once you attempt to clean dust and dirt on an outsized surface by using filters like Dust & Scratches or Median which is essential. If you get to ascertain a typical Photoshop tutorial that teaches you ways to wash all the dirt with the Median filter, the question of pasteurization is typically carefully avoided, as if it doesn’t exist. Although we’ll affect it head-on, as there’s nothing worse than a picture covered in weird stripes. Once you have your image severely pasteurized, there could be no way back.
Pasteurization:
When you use filters like Dust & Scratches or Surface Blur, you would possibly encounter pasteurization in your images. This is often a really unpleasant visual effect when rather than a smooth gradient you get abrupt tone changes visible to the eye .
We used Dust & Scratches filter on the proper image then darkened it to form the effect more visible Just imagine that rather than cleaning the background only where it is necessary, I might just select it all and apply some filters thereto. Just try it, and despite the very fact you would possibly not be ready to see it on your monitor immediately, pasteurization is going to be present within the image.
you only access the amount and move the leftmost slider right till it hits about 210. You’ll see weird colored blots rather than smooth transitions. But it’s still there, and this pasteurization won’t get away once you resize the image within the original image state; it isn’t so evident. Fighting pasteurization isn’t easy, therefore the best method here is really prevention.
So, the simplest quiet prevention isn’t using any filters or commands which may cause pasteurization in the first place. If you color correct in Photoshop by using Levels or Curves, you’ll make it appear without even noticing. it’s why we mostly color correct using Adobe Camera Raw plug-in and avoid any changes of the tonal home in later stages of retouching.
So, What you ought to avoid also is using the Dust & Scratches or the Surface Blur on the entire background. But one thing is to use blurring within the History Brush mode once you apply the blurring effect locally. Blurring the entire background is another thing – you catch on pasteurized, and heavily if you are not careful enough. Also even local pasteurization is an annoying problem, so let’s now find out how to affect it if you cannot refrain from using blurring filters.
Isolating the background from the object/model and blurring and doing other things thereto on a separate layer, this makes perfect sense to use the blurring effect locally. People need to take care as you compared to the sides , that is, to not smudge them also, but it doesn’t require the maximum amount of precision as when you’re isolating.
This is important to know that the more blurring you apply the more severe asteurization you get. Keeping it to the minimum, it is sensible if you smudge huge chunks of dirt and things like that with the Mixer Brush before using the background cleaning action. You’ll be ready to apply blurring filters with less cruel and pasteurizing settings, as you simply need big radii once you need to eliminate big dirty spots with this precaution. The Mixer Brush itself doesn’t bring the maximum amount pasteurization as you’d expect from such a smudging tool.
Finally, as we’re doing everything we will fight the band, there is a question that arises pretty naturally: “Can we use the frequency separation technique to wash backgrounds? the rationale is you recognize that when the frequencies are split, you’ll protect all the tiny details by preserving them within the high-frequency layer.
By all the ultimate details safe, there’ll be no banding”. That’s true. Also, you’ll run the frequency splitting action, then smudge all the dirt on the low-frequency layer, then switch to the highest layer and use the Clone Stamp the maximum amount as you would like no banding and everyone.
Yet there’s one huge flaw of this method: you’ve got to wash the entire background twice. There’s a Double amount of labor – first, you clean the low layer then you clean the high layer. In my opinion, it’s absolutely worth using an action that applies to smooth filters and noise, as you are able to wash the entire thing on just one occasion and permanently.
But, the splitting method should only be used once you can’t use the smoothing method – just in case the background can’t be smoothed due to its texture. once you can’t fake it by using noise, you cannot smooth it, that’s just about evident.


Content-aware Scale & Fill:
If you do not need to isolate, new problems arise counting on how careful photographers aim when shooting. While you crop images, most of the time you’re alleged to confirm that objects or models are centered and aren’t leaning to any of the edges. But, if photographers aren’t careful enough, you would possibly encounter 2 unpleasant situations:
within the first one you will not be ready to center a product, because you will not have enough background to try to and within the other won’t be ready to rotate a product, and in both cases, some blank canvas is going to be added to your images after you align them. Let’s examine what exactly happens, why, and the way to repair it.
Those content-aware fills and scales are often wont to fill gaps within the background after rotation and cropping, but the content-aware fill is additionally good once you get to the center. This is often an honest idea to remind photographers to not come too on the brink of models though. When a picture has enough background round the model, you would not get to fill any gaps. In order that is merely true when there’s enough background actually.
Also, I’ve seen many photoshoots where photographers used a comparatively small backdrop. In cases like that, your sole option would be adding more background altogether. This doesn’t happen in big studios though. So, you’ll download the pictures for practice purposes from the gallery above. Every thumbnail is linked to the respective hi-res image, just click on the thumbnails you would like to open during a separate window.